http://www.dwh-club.com/dwh-bi-articles/new-features-ca-erwin-data-modeler-r8.html New Features of CA ERwin® Data Modeler r8
Submitted by admin on Tue, 11/15/2011 - 02:29
Disclaimer.
This article is not an official CA Technologies material. Use this article to first look briefly at features and changes which were made in ERwin 8r. Use the CA ERwin Data Modeler Help system to get the detail official information.
New Features of CA ERwin® Data Modeler r8
On 2011 year, CA Technologies launched new r8 version of its well-known modeling product family. This product bunch includes CA ERwin Data Modeler, CA ERwin Data Model Validator, CA ERwin Data Profiler, and CA ERwin Data Modeler Saphir Option for ERP. With the exception of ERwin 8r, all other products of the 8r line are not described in this article.
There are a number of distinct editions of CA ERwin Data Modeler 8r: Community Edition, Navigator Edition, Standard Edition, and Workgroup Edition.
CA ERwin Data Modeler r8 has many new features and enhancements applied to functionality and the user interface. This article briefly reviews new features of CA ERwin® Data Modeler r8.
There are the several following novelties and enhancements in ERWin of version 8r:
- Bulk Editor and Bulk Editor Wizard
- Support of Newest Database Management System Versions
- Crystal Reports
- Subject Areas
- Auto Hide Feature
- Toolbars
- Panes
- Text Editor and Spell Checker
- Auto-layout options
- Property Editors' Enhancements
- Link objects and Link Wizard
- New Zoom Tool and Overview pane
- Go To Functionality
- Annotation and drawing objects
- Object's Hint
- Diagram Picture
- Model Themes
- History and Notes
Bulk Editor and Bulk Editor Wizard
The Bulk Editor is one of the new features of CA Erwin Data Modeler 8r. Using the Bulk Editor can be extremely useful in case of a need to review and edit numbers of model objects' properties. For example, imagine all model entities and all tables do not have definition attributes and the goal is to add definitions for each entity and each table. Instead of opening serially the property window for each object, we can perform bulk editing of definitions for all these objects in the Bulk Editor. Also, another advantage is that Bulk Editor allows us to work with properties and objects without installing ERwin. Suppose some of the employees do not have ERwin installed on their computers, and these employees want to participate in reviewing and editing a data model. The Bulk Editor is the solution for both situations. Let us briefly review how we can provide model's information and perform bulk editing in these cases.
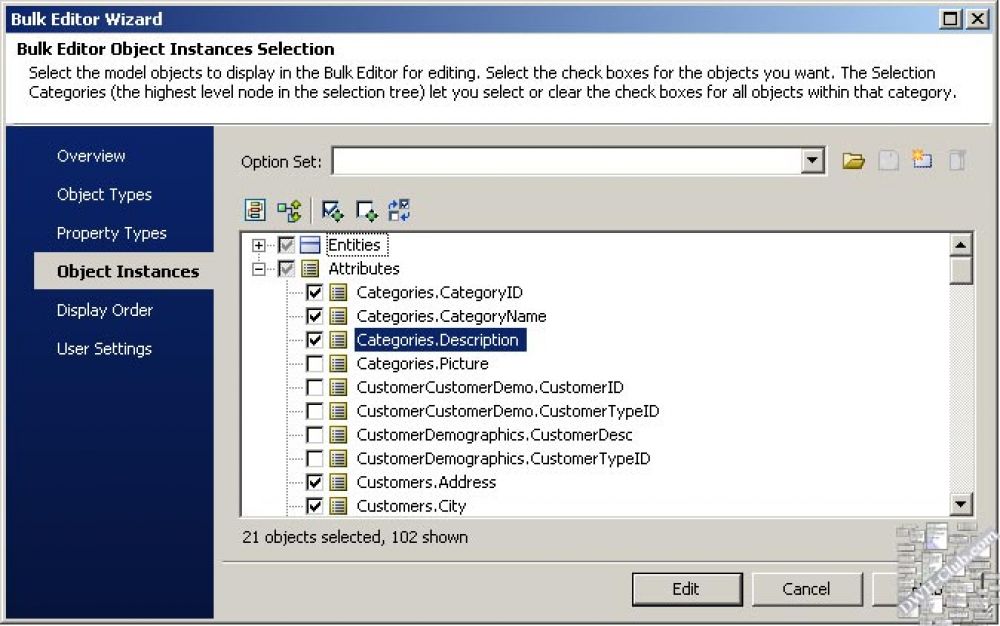
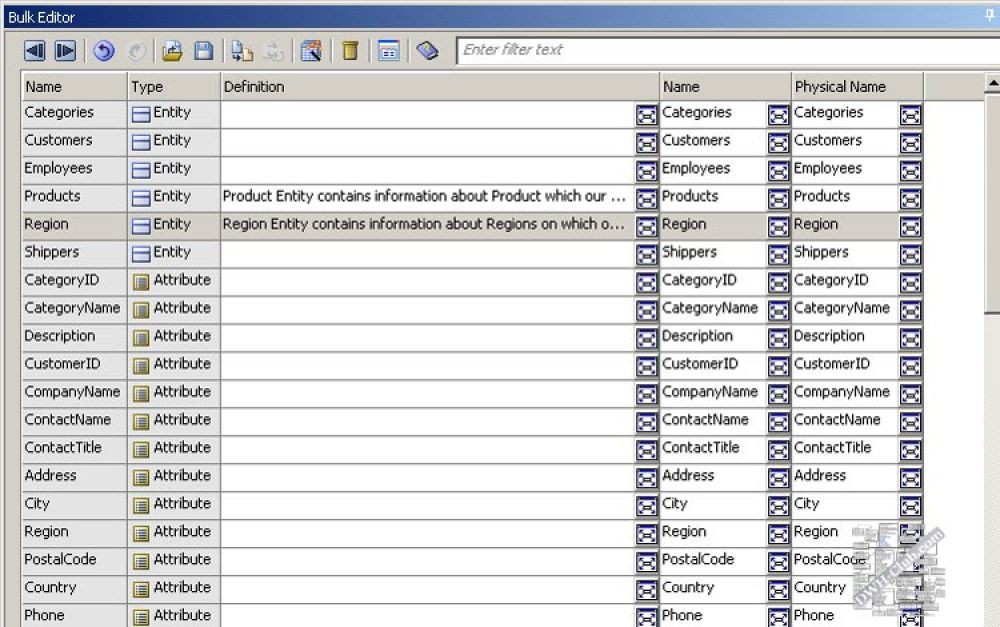
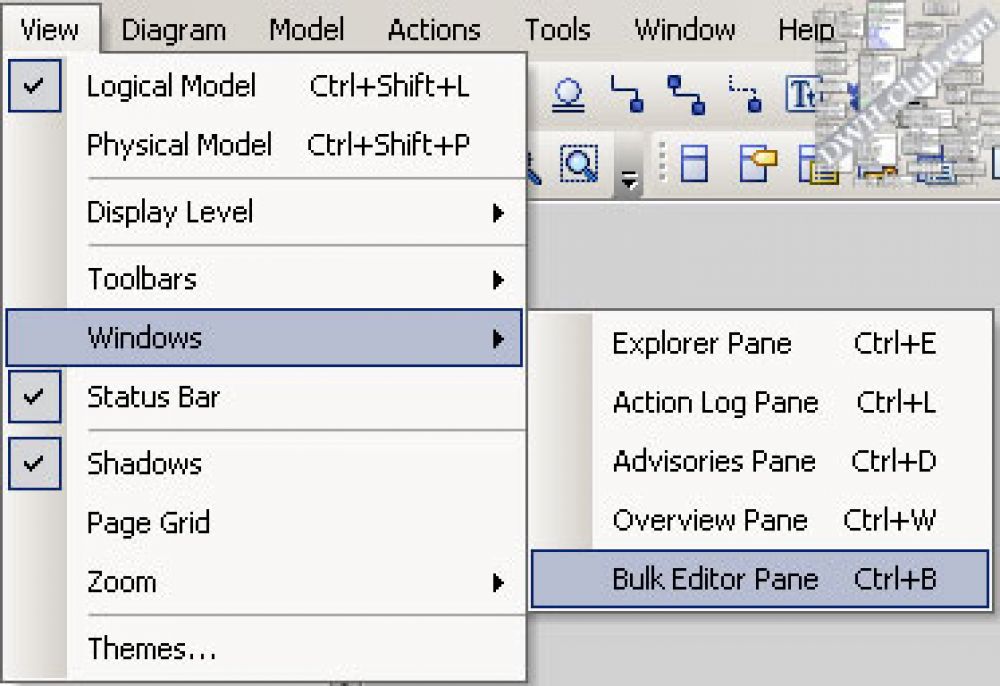
First of all, to display the Bulk Editor pane within the work area of CA Erwin Data Modeler, choose Windows menu item on the View menu and click Bulk Editor Pane item. Likewise all other panes of Erwin Data Modeler 8r, the Bulk Editor can be resized, rearranged, hided or floated within the application. Because the Bulk Editor is empty the first time we open it, click the Bulk Editor Wizard icon  on the pane toolbar. The Bulk Editor Wizard is opened, and we can select objects and properties which are should be reviewed and edited.
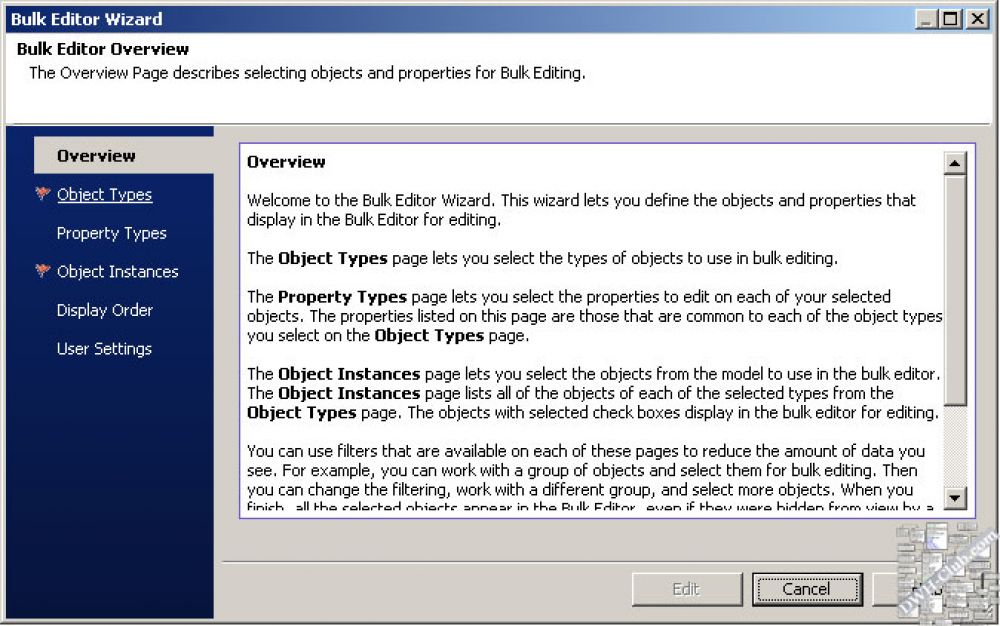
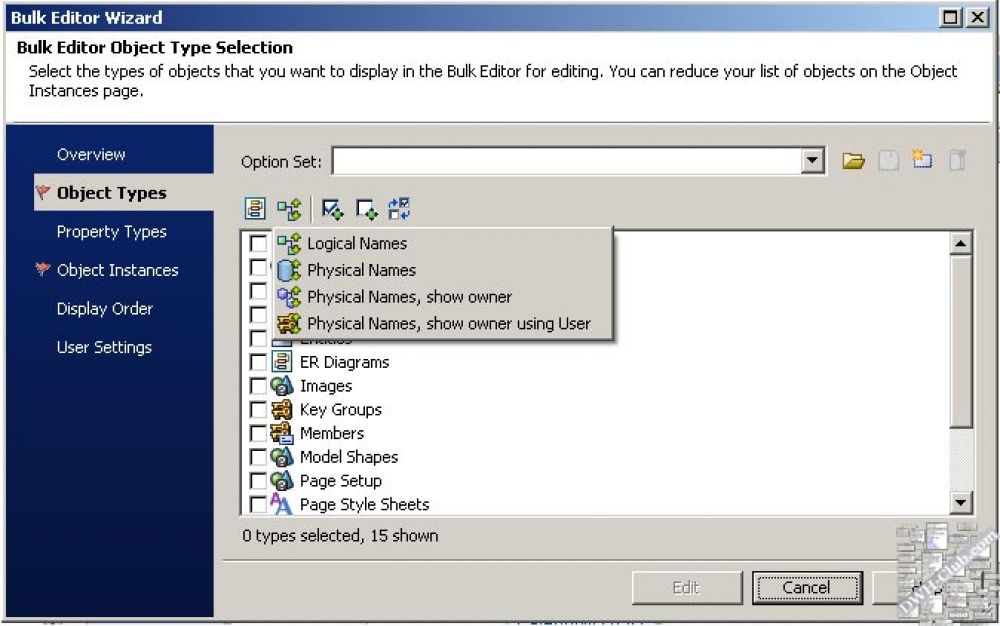
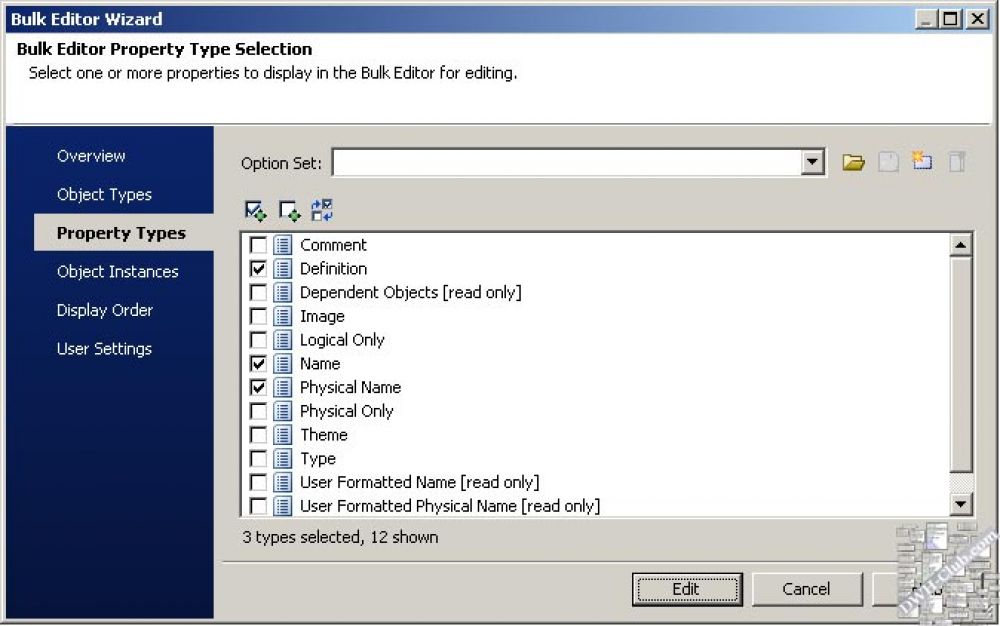
The Bulk Editor Wizard contains the following pages: Overview page, Object Types page, Property Types page, Object Instances page, Display Order page, and User Settings page.
- The Overview page provides short description for each page of this wizard.
- The Object Types page lets us choose and select the types of objects which would be used in the Bulk Editor.
- The Property Types page lets us choose and select the properties to edit for each object.
- The Object Instances page lets us choose and select the particular objects from the model to use in the Bulk Editor.
- The Display Order page lets us specify order in which rows for the object types and columns for the properties would be displayed in the Bulk Editor.
- The User Settings page lets us manage optional behavior of the Bulk Editor.
Having chosen all necessary options and clicking Edit button, we can see all chosen object and their properties in the Bulk Editor. Now, we can directly edit objects' properties in the Bulk Editor. We can edit almost all objects' properties except for system maintained properties, vector properties (properties with more than one value), and bit-field properties, such as Trigger Type. It is possible to copy value to clipboard, make changes and paste the changes back into the Bulk Editor, delete objects, etc.
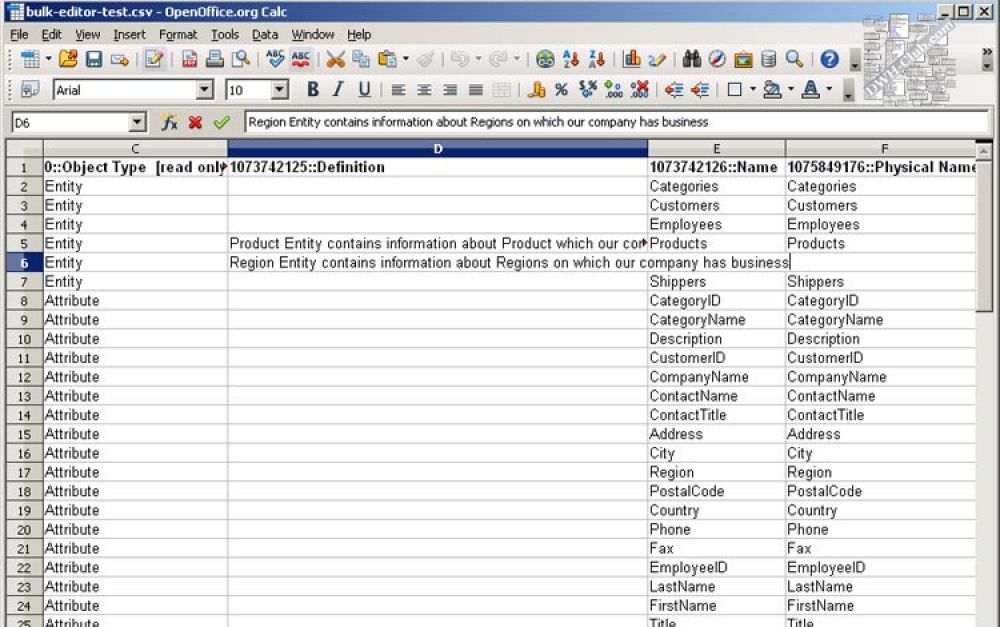
Moreover, I believe this is its most important feature, the Bulk Editor lets us export information to and import it from an external csv-file. Thus, when it is needed to perform bulk editing of model objects' properties outside ERwin, just perform the following steps:
- Use the Bulk Editor Wizard to choose object types, property types, and object instances to populate the Bulk Editor
- Select the rows in the Bulk Editor which you want to edit in external spreadsheet application, and click the "Save selected rows to .csv file" icon
 on the pane toolbar to export information to a csv-file
 - Open the csv-file in the spreadsheet application – employees without installed ERwin can be provided with this csv-fail, – perform needed editing, and save the file
- In the Bulk Editor, click the "Import model updates from .csv file" icon
 on the pane toolbar to import the updates from the csv-file.
Figures 01-08.
Using Bulk Editor and Bulk Editor Wizard (the images are clickable)
Doubtless, ability to perform bulk changes of many objects and properties and especially ability to export and import data make the Bulk Editor an extremely useful tool for data modelers.
Support of Newest Database Management System Versions
Erwin Data modeler r8 includes updated support for DB2 for LUW and DB2 for z/OS, provides improved support for SQL Server 2008, and support for Teradata 13.0.
Support for SQL Server 2008 features includes:
- Filtered indexes
- Sparse columns
- Change data capture
- Synchronous net-changes change tracking
- New data types (DATETIME2, DATETIMEOFFSET, TIME; GEOGRAPHY, GEOMETRY; FILESTREAM; HIERARCHYID)
The following new physical objects were added to support SQL Server 2008:
- Cryptographic Providers
- Database Audit Specifications
- Database Encryption Keys
- Full-text Stoplists
- Resource Pools
- Server Audit Specifications
- Server Audits
- Spatial Indexes
- Workload Groups
The following Teradata Version 13 features were included:
- Global Persistent Data Sets
- Replication Rule Sets
Crystal Reports
A copy of Crystal Reports 2008 and the Report Viewer are included with ERwin 8r (note Crystal Reports is not included with the Community Edition of ERwin 8r). Crystal Reports can be used to build reports on any open model. To create reports, we set ERwin as the current data source and query the ERwin metadata. Pre-designed reports are available and can be reached by using the Pinned Reports menu item of the Tools menu. Although Crystal Reports is not available in the Community Edition of ERwin, the Report Viewer allows us to view pre-designed reports.
Pre-designed reports are available and can be reached by using the Pinned Reports menu item of the Tools menu. The following pre-designed reports are available in ERwin r8: Current Diagram Membership (Logical).rpt; Current Diagram Membership (Physical).rpt; Diagram Picture Report.rpt; Inheritance State of Attributes.rpt; Inheritance State of Columns.rpt; Logical Dictionary.rpt; Logical-Physical Combined Dictionary.rpt; Logical-Physical Properties.rpt; Physical Dictionary.rpt; Physical Indices.rpt; Session Activity.rpt; Subject Area Membership.rpt.
The Report Viewer provides the capability to view and refresh the reports, search a text within reports, print reports, and export reports to other formats. The following formats are supported: Adobe PDF (.pdf), Microsoft Excel 97-2003 (.xls), Microsoft Word (97-2003), Rich Text Format (.rtf), and XML (.xml).
Subject Areas
ERwin r7.x concept of Main Subject Area is now obsolete. Moreover, in ERwin r8, it is not necessary that a model contains a subject area at all. Depending on the particular model's needs, subject areas can be created or not.
When an r7.x model is opened in ERwin 8r, the Model Upgrade wizard opens. The wizard provides options to choose whether to retain the main subject area in the upgraded model or not.
Auto Hide Feature
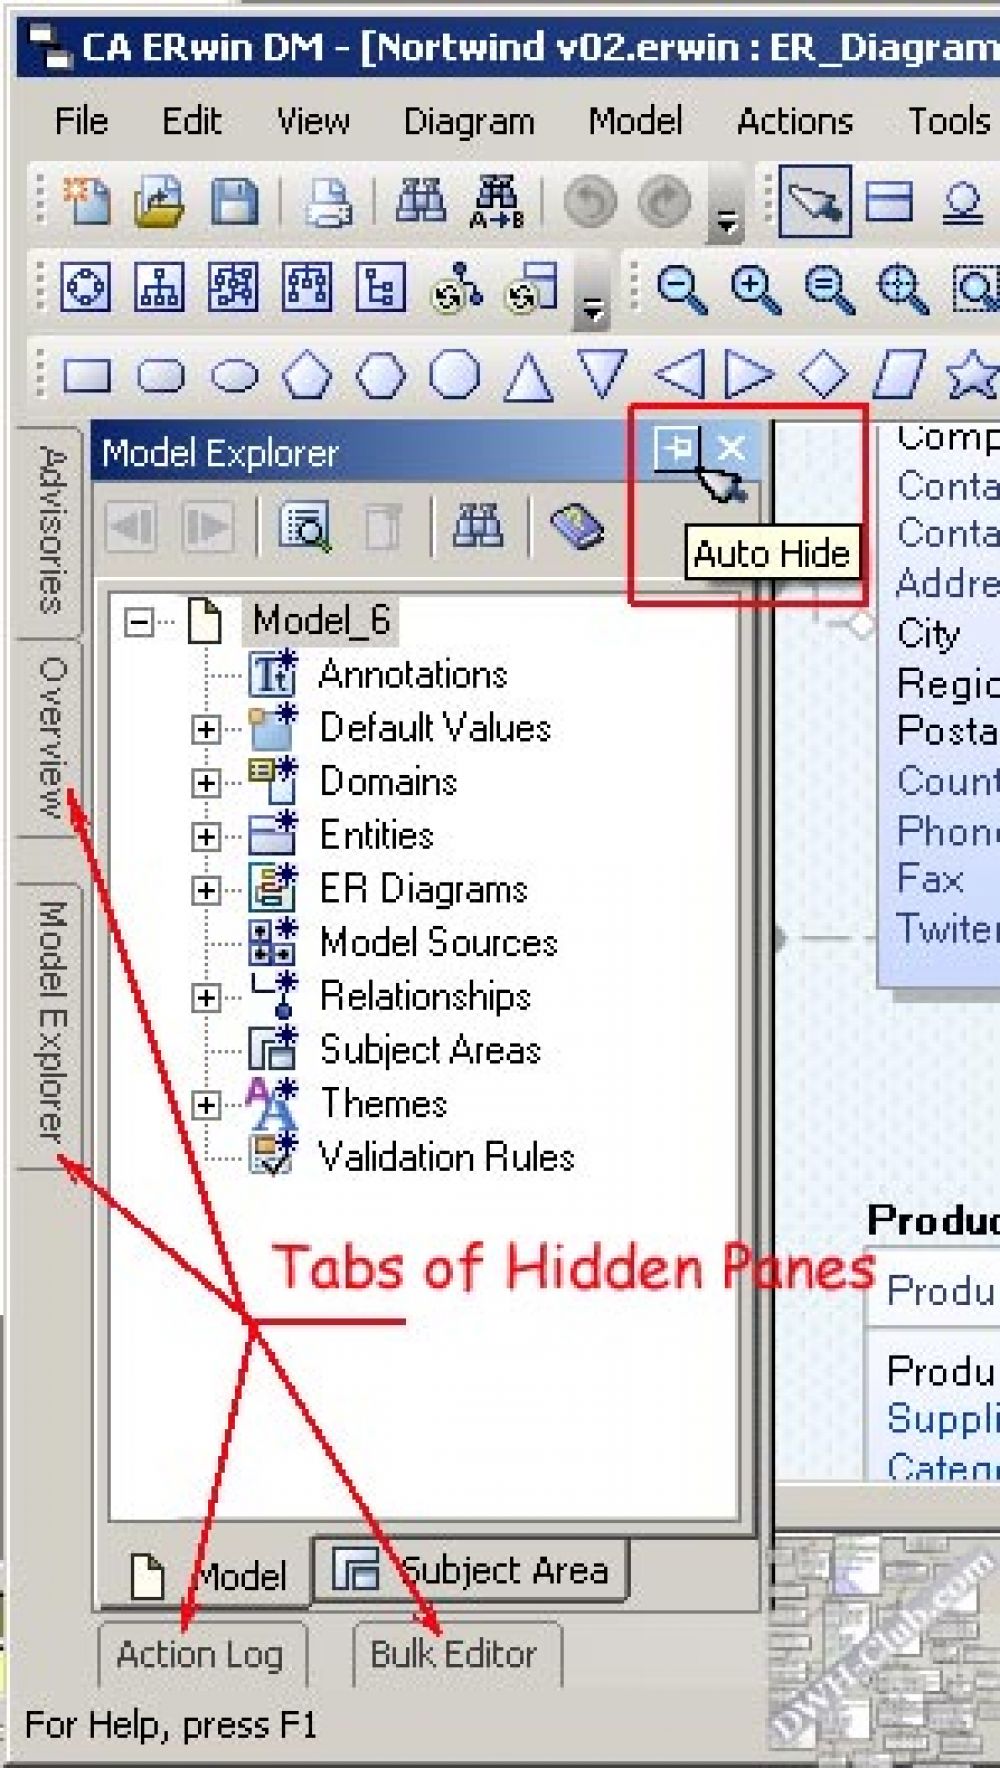
The Auto Hide option can be turned on for all Windows panes (Explorer Pane, Action Log Pane, Advisories Pane, Overview Pane, and Bulk Editor Pane). If this option is On for a certain pane, the pane only appears when it is needed for work and the pane hides at all other times.
To activate Auto Hide option, click the pushpin icon  in a pane title bar; just then the pane becomes a tab in the application.
Figures 09.
ERwin 8r Auto Hide Features (the image is clickable)
If a hidden pane is needed to work, just move the mouse pointer over the tab that represents the needed pane; and the pane will be restored. When the mouse pointer leaves the pane area, the pane is auto-hides and becomes the tab once again.
To turn off Auto Hide feature, click the pushpin icon  in a pane title bar when the pane is open.
Toolbars
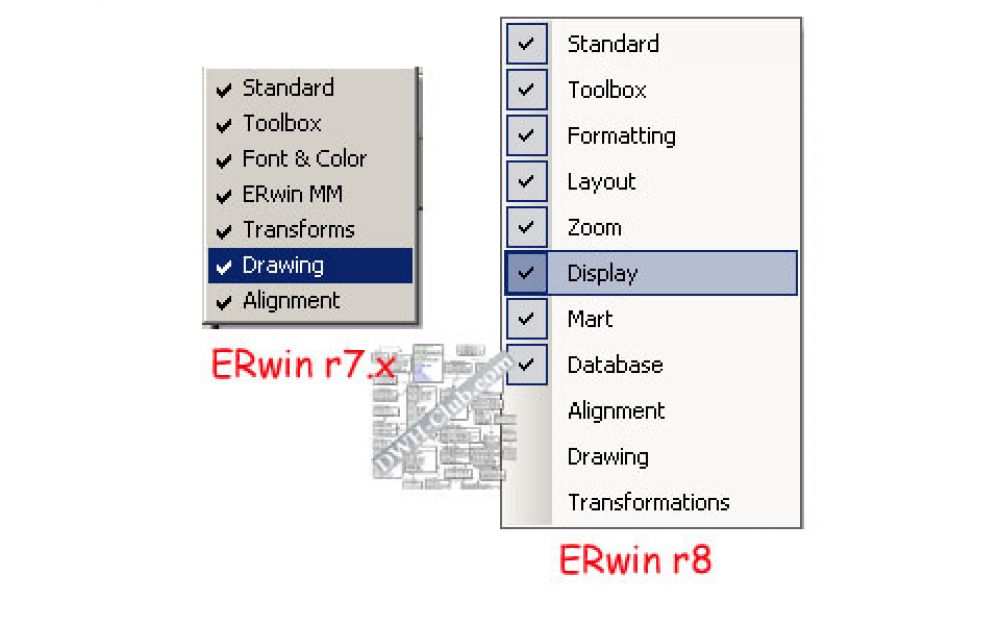
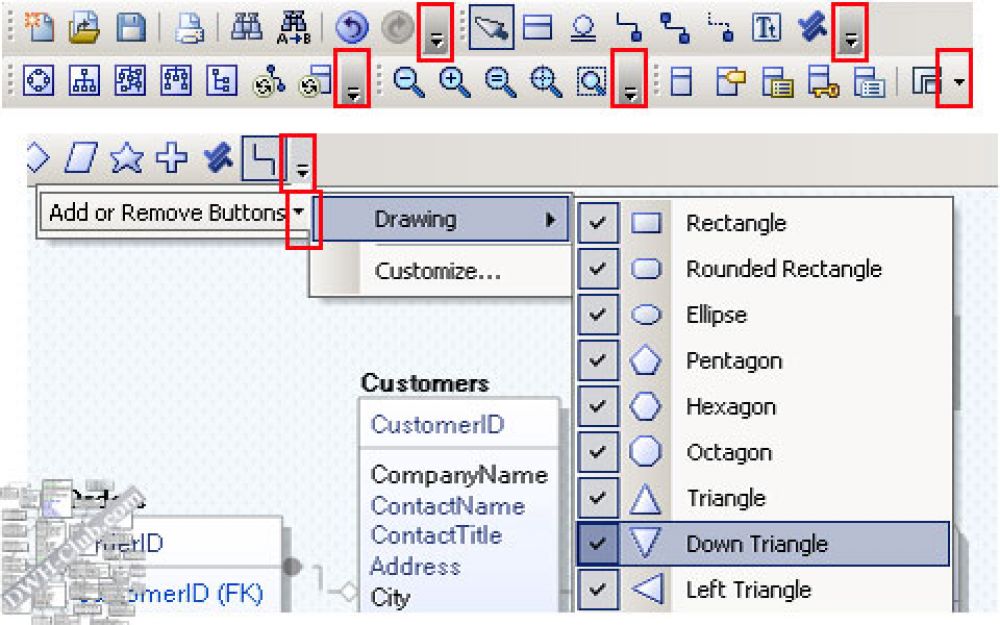
We can see several new toolbars in the new version of ERwin Data Modeler. Moreover, each toolbar can be personalized by using the drop-down menus associated with each toolbar. These drop-down menus allow us to customize any toolbar. Any specific tool can be showed or hidden on the toolbar.
Figures 10-11.
ERwin 8r Toolbars and Toolbar's customization (the images are clickable)
Panes
There are five additional panes in ERwin 8r: Explorer pane, Action Log pane, Advisories pane, Overview pane, and Bulk Editor pane. The panes provide additional useful functionality.
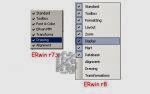
Each pane can be hidden or showed by using the Windows menu item of the View menu. Also, panes can be docked at a convenient for a modeler position (positioned to any border of workspace), can be put in any place of the workspace (floating position). Moreover, each pane can be set in the auto-hide mode providing eo ipso much more space for diagram.
Figures 12.
ERwin 8r Window Pane Menu (the image is clickable)
Text Editor and Spell Checker
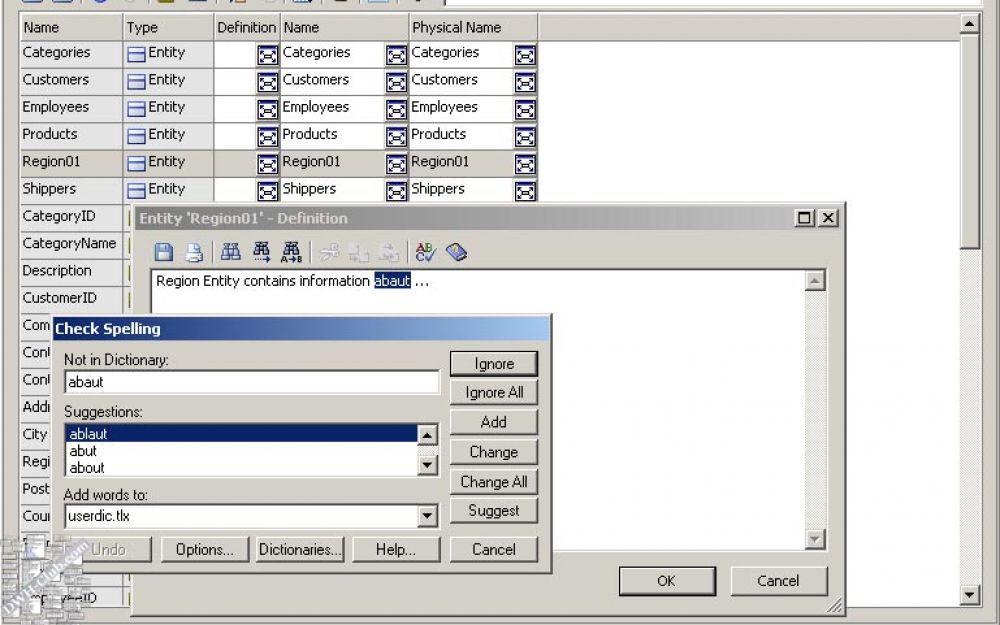
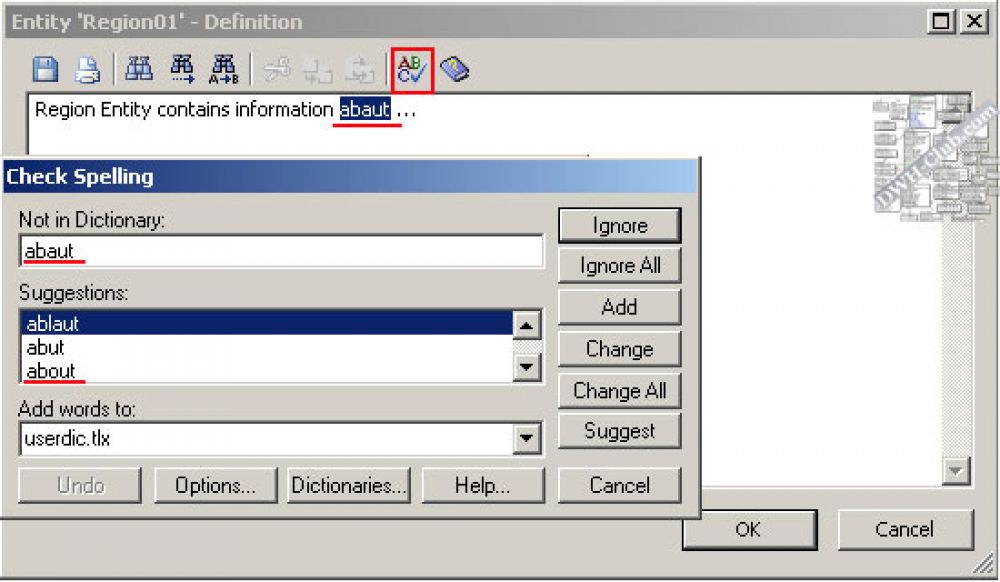
The Text Editor is available in dialog tabs which provide the capability to work with text, such as the Comment tab, the Definition tab, etc. The Text Editor provides additional functionality to work with the text: to save, to print, to search and/or replace text, and especially to check the spelling of the text written in this fields.
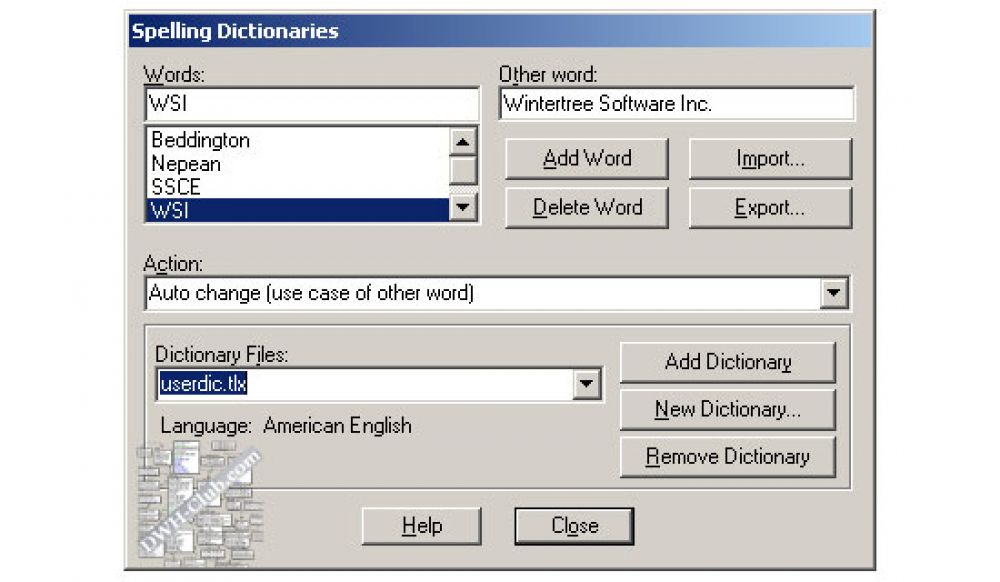
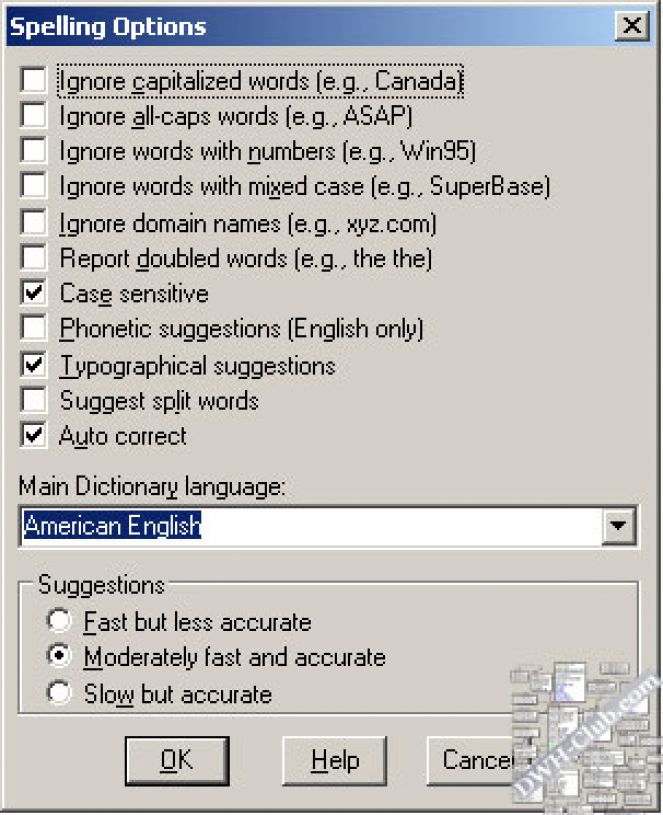
Spell-check functionality of ERwin 8r allows us to check whether we have made any spelling mistakes in the text. Also, these are possible to select dictionary languages, customize the dictionaries, specify various spelling-checker options, and determine the speed and accuracy of search for suggested replacements for misprinted words.
Figures 13-15.
ERwin 8r Spell Checker and Spelling Options (the images are clickable)
Auto-layout options
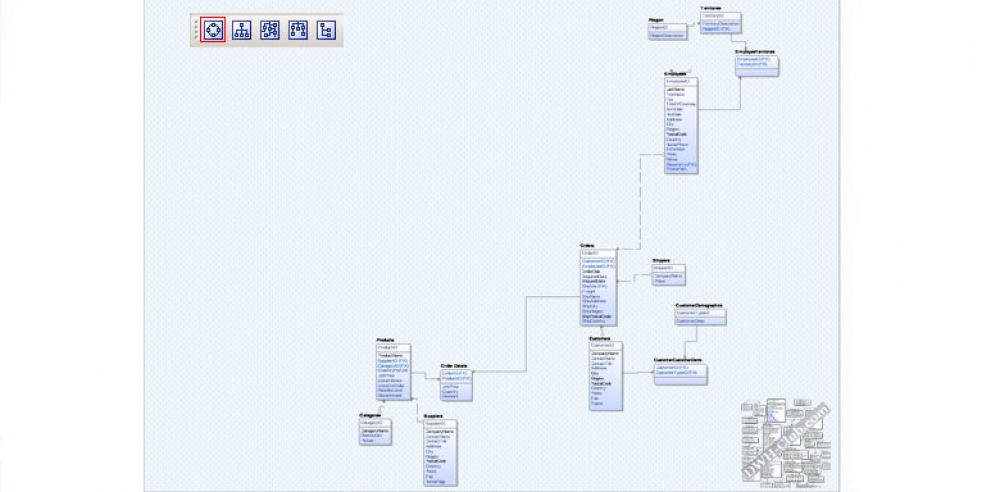
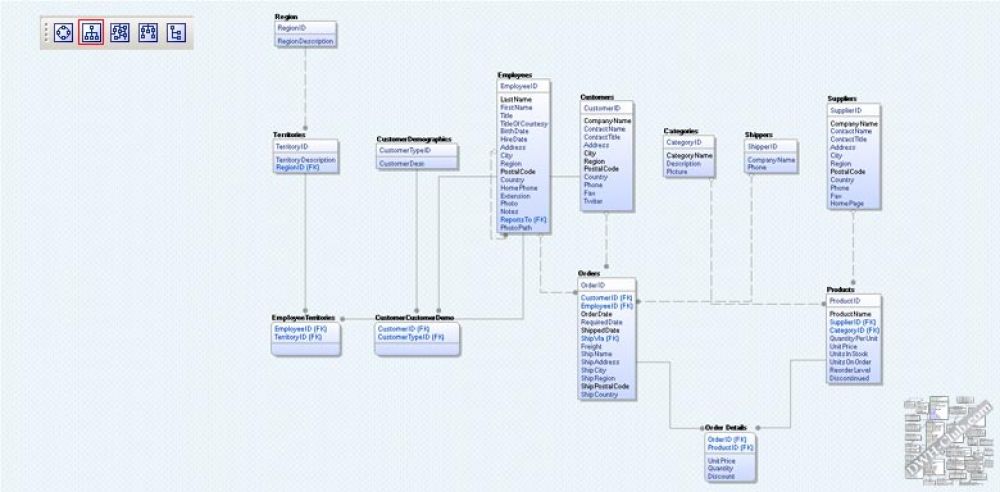
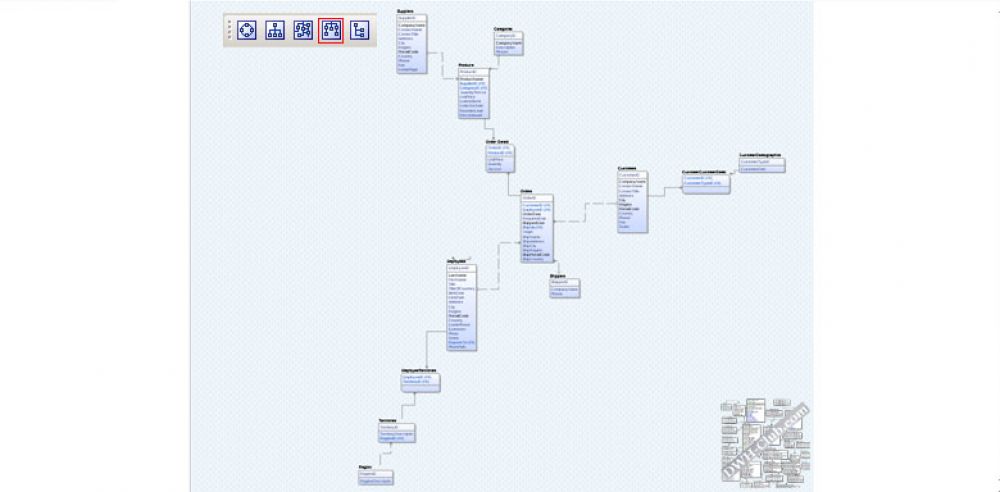
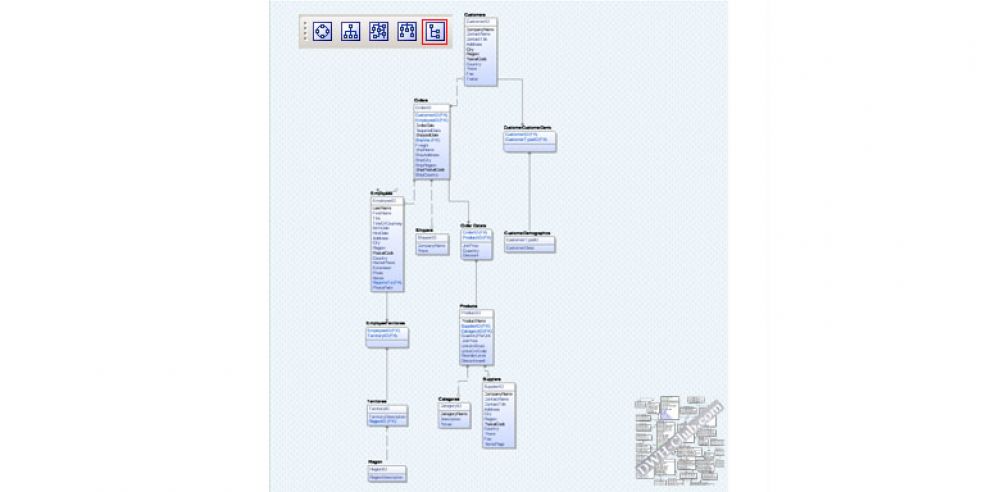
ERwin 8r allows us quickly and automatically lay out diagram's objects which are become disorganized during designing process. It is possible to implement a particular layout type to several selected diagram's items, or an entire model can be organized in a certain style of layout. Layout types include:
- Circular Layout
- Hierarchical Layout
- Orthogonal Layout
- Symmetrical Layout
- Tree Layout
To automatically lay out a diagram, the Layout Toobar or the Layout menu item of the Diagram menu can be used.
Figures 16-20.
Northwind Diagram in Different Layouts:
Circular Layout, Hierarchical Layout, Orthogonal Layout, Symmetrical Layout, and Tree Layout (the images are clickable)
Property Editors' Enhancements
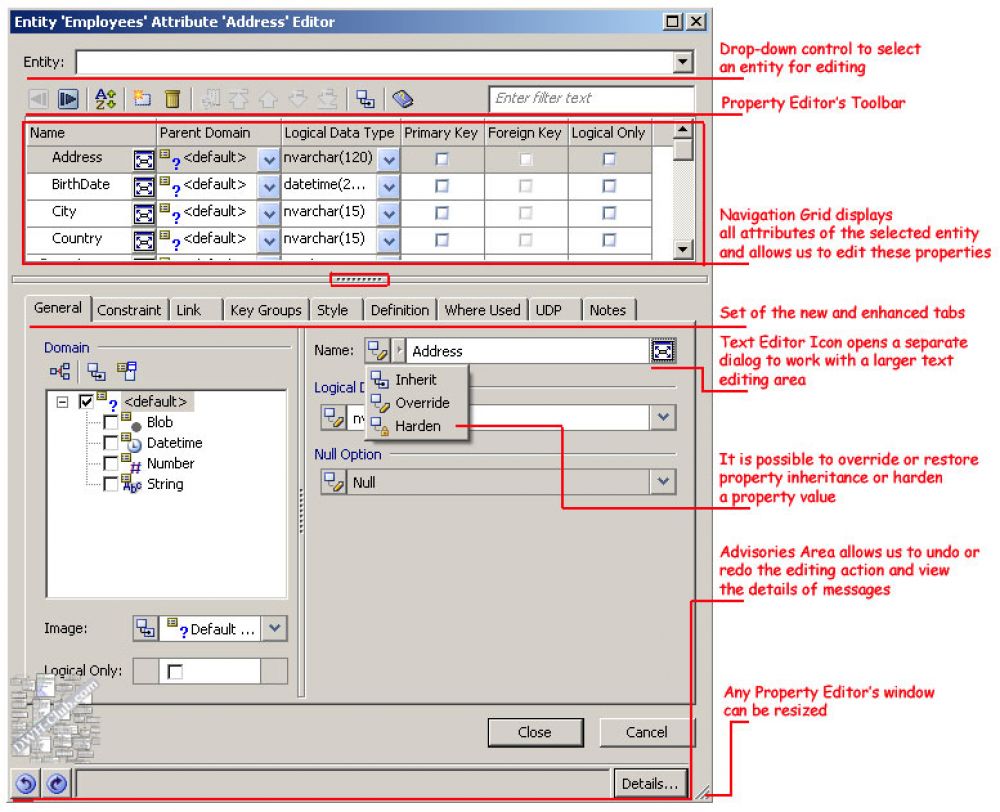
Property Editors are significant enhanced in ERwin 8r. The editor dialog windows became resizable, scrollable, and adaptable. Enhancements were made to the Property Editors' tabs. Also, there are some new tabs: the Link tab, the Style tab, the Where Used tab, and the Notes tab.
- The Link tab allows us to view and manage the column denormalization transformations.
- The Style tab allows us to define a display style for the selected object by using a Theme.
- The Where Used tab allows us to see where an object is used in the model.
- The Notes tab allows us to see, enter or modify user notes for the object and view object history.
Figures 21.
ERwin 8r Property Editors' Enhancements (the image is clickable)
Link objects and Link Wizard
The column denormalization transformation is implemented differently in versions r8 and ERwin r7.x. To perform the column denormalization, the Link object is used. A Link object is automatically created to link an attribute/column of a source entity/table to an attribute/column of a target entity/table. The Link object synchronizes all changes of one attribute/column to another attribute/column.
The Link Wizard is used to create Link objects and define their properties. The Attribute Editor and the Column Editor contain the Link tab which allows us to launch the Link Wizard.
When an r7.x model that contains column denormalization transformations is converted to r8, the attributes of the column denormalization transformations become the link objects.
Figures 22.
Creating of ERwin 8r Link Object (the image is clickable)
New Zoom Tool and Overview pane
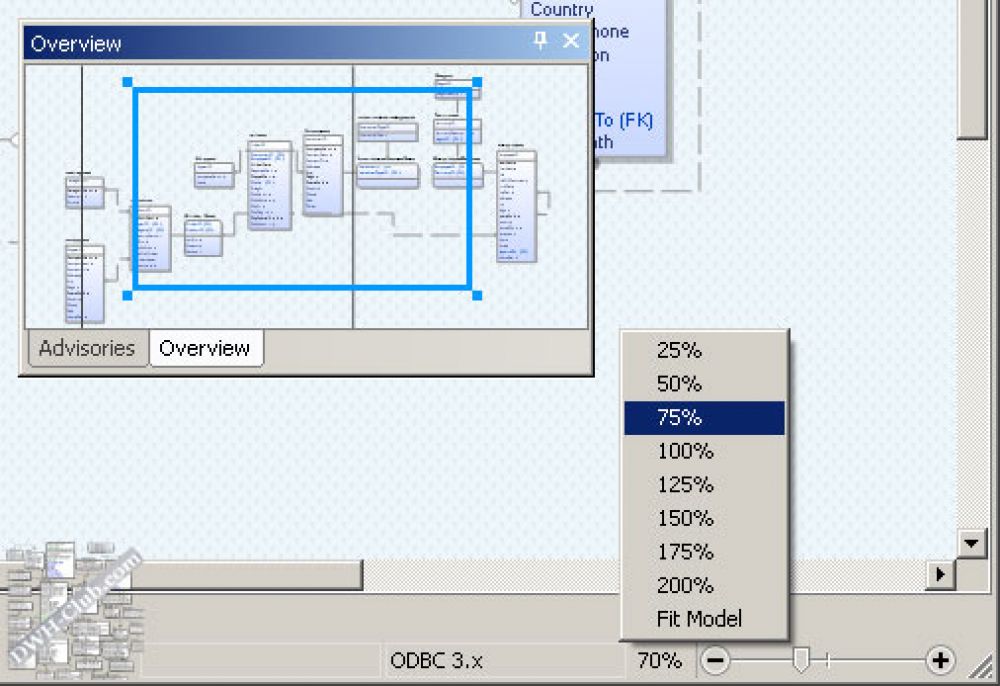
New Zoom Bar is located on the bottom right-hand corner of the application. The Zoom bar consists of two parts. The first is the rectangle button which displays percentage information. Clicking on this button shows the pop-up rectangle which provides choice from the list of zoom percent values. The second element is the zoom slider. Dragging the pointer of this slider, the scale of diagram image can be changed between 1% and 200%. Also, the zoom percent value can be manipulated by clicking on the plus or minus signs at the ends of the zoom slider.
There is one more way to change the scale of diagram image and navigate through a model. The ERwin 8r Overview pane has the marquee rectangle that is used to determine diagram's area that is visible in the drawing workspace. Moving and resizing of this marquee rectangle can change visible diagram's area as well as scale of diagram image.
Figures 23.
ERwin 8r New Zoom Tool and Overview pane (the image is clickable)
Go To Functionality
Go To functionality allows us to quickly change the diagram focus to the needed diagram's object. The Go To dialog box is launched by pressing Ctrl+G keys. The dialog box contains the list of all model's objects. Select any item from the list and click the Go To button, to move focus to this object on the diagram.
Figures 24.
ERwin 8r Go To Dialog Window (the image is clickable)
Annotation and drawing objects
In additional to drawing object, new object that is called Annotations is available in ERwin 8r. Unlike drawing object which are "local" object and has restricted visibility, annotations have "global" visibility and can be reused across all diagrams. Note annotation objects require additional memory, so use them if they are needed across a few models.
The new Drawing toolbar contains more drawing tools that the Drawing toolbar of ERwin 7r does, but the Polygon and the Text tools are omitted from the ERwin 8r Drawing toolbar. Omitting the text tool from Drawing objects looks no so good because of creating a new global object every time a text commentary needs, even though this commentary is not reused.
Object's Hint
This is a pleasant effect rather than big improvement. When the cursor moves over diagram's object, the hint appears and shows us information about this object.
Figures 25.
Object's Hint in ERwin 8r (the image is clickable)
Diagram Picture
Generation of illustrated (pictorial) reports is available in Erwin 8r. The illustrated reports can be useful to share a data model with colleagues who do not have CA Erwin Data Modeler installed on their computers. To generate a diagram picture, use the Diagram Picture menu item of the Tools menu. Also, an illustrated report can be created by using Crystal Reports integrated into ERwin 8r.
Model Themes
ERwin 8r provides more capability for art designing models and diagrams than previous versions of this modeling tool do. Art features are available by using themes. Themes are a combination of formatting and display options (such as font, color, style, etc.) which can be applied to design model's objects. The theme features of Erwin allow us to completely control over color, lines, and gradients for the diagram or any objects. To modify a theme or create a new theme, the Theme Editor is used.
History and Notes
ERwin 8r can trace the history of all diagram's objects. Moreover, the History and Notes functionalities are combined. ERwin provides data designers with a complete list of automatically generated historical records and commentaries written by the model's developers.


 flet says: